Why Your Curtains Are Making Your Windows Look Small

In this post, you will learn the architectural principles of window treatments to ensure your curtains enhance your natural light rather than shrinking your view. We will cover the three primary mistakes—incorrect rod placement, insufficient fabric width, and improper length—that cause windows to appear smaller and rooms to feel cramped. By applying these structural adjustments, you can manipulate the visual perception of your ceiling height and window scale without a full renovation.
The Physics of Visual Scale
Most people treat curtains as an afterthought or a simple way to block light, but from a design perspective, window treatments are structural elements. When you hang curtains, you are essentially creating a "frame" for your view. If that frame is too tight, too low, or too narrow, the eye perceives the window as a small, isolated aperture rather than an expansive source of light. This creates a visual "bottleneck" in your room, making the walls feel closer together and the ceilings feel lower.
To fix this, you must stop thinking about the window itself and start thinking about the wall space surrounding it. The goal is to trick the eye into seeing the window as larger than its actual dimensions. This is a matter of proportion and geometry, not just picking a pretty fabric.
Mistake 1: The "Low and Narrow" Rod Placement
The most common error I see is mounting the curtain rod directly onto the window frame or just a few inches above it. This is a fundamental mistake that anchors the eye to the actual window edge, highlighting its true (and often small) size. When the rod sits right on the casing, it creates a heavy horizontal line that cuts the wall in half, effectively "shortening" your walls.
The High-and-Wide Rule
To maximize the perceived scale, you must move the rod up and out. Instead of mounting the rod at the top of the window frame, mount it 4 to 6 inches above the frame, or even halfway between the window and the ceiling. This draws the eye upward, creating an illusion of taller ceilings. If you have a standard 8-foot ceiling, placing the rod closer to the ceiling line can make the room feel significantly more grand.
Similarly, do not mount the rod at the side edges of the window. Extend the rod at least 6 to 10 inches beyond the window frame on both sides. This allows the fabric to rest against the wall when the curtains are open, rather than covering the glass. This technique, known as "stack back," ensures that when your curtains are pulled aside, you are seeing the maximum amount of glass and natural light. A wider rod makes the window appear broader, which adds a sense of luxury and openness to the room.
Mistake 2: Underestimating Fabric Volume and Fullness
If your curtains look like a flat sheet of fabric stretched across a rod, you have a volume problem. Many people buy exactly enough fabric to cover the width of the window, but this results in a "skimpy" look that makes the window appear pinched. When the fabric is stretched thin, it loses its ability to create the soft, architectural folds that add depth to a room.
Calculating Fullness for Depth
To achieve a professional look, you need to account for "fullness." This is the ratio of the width of the curtain to the width of the rod. For a standard, high-quality look, you should aim for 2.5 times the width of the window. If you are using sheer fabrics, you can get away with 2 times the width, but for heavier materials like velvet or heavy linen, 3 times the width is ideal.
- Sheers: Aim for 2x width to maintain a light, airy feel without looking cluttered.
- Linen/Cotton: Aim for 2.5x width to ensure the folds look intentional and structured.
- Blackout/Velvet: Aim for 3x width to provide the weight and density required for a high-end, tailored appearance.
Without this extra fabric, your windows will look "starved" of material. This lack of volume makes the window look like a narrow slit rather than a wide, inviting opening. If you find yourself struggling with the scale of your furniture, remember that clever tricks to maximize every square foot often start with these structural textile adjustments.
Mistake 3: The "Floating" Hemline
The length of your curtains is perhaps the most critical factor in determining whether a window looks intentional or accidental. A "floating" hem—where the curtains end 2 or 3 inches above the floor—is a design error that creates a visual break. This gap acts as a visual "stop," telling the eye that the window ends there, which prevents the vertical lines from reaching the floor and extending the room'ically.
Choosing the Right Drop
There are three professional ways to handle the length of your curtains, depending on the vibe of the room:
- The Kiss: The hem just barely touches the floor. This is the standard for a clean, modern, and tailored look. It works well in living rooms and dining rooms where you want a crisp finish.
- The Puddle: The fabric gathers on the floor by 1 to 2 inches. This adds a sense of softness and luxury, often seen in bedrooms or more formal spaces. However, be careful with puddling in high-traffic areas like entryways, as it can collect dust and become a tripping hazard.
- The Hover: If you have a very high-traffic area or are using a heavy rug, you can have the curtains hover exactly 0.5 inches above the floor. This is the absolute minimum distance allowed; any higher and it looks like you simply bought the wrong size.
Avoid the temptation to hang curtains at a length that leaves a gap. A gap creates a "stunted" look that makes your ceilings feel lower and your windows feel smaller. A continuous line from the high rod to the floor creates an unbroken vertical movement that expands the space.
The Impact of Hardware and Texture
Once you have corrected the placement, width, and length, you must consider the hardware and the weight of the fabric. The hardware is the "skeleton" of your window treatment. A thin, flimsy rod will bow under the weight of heavy drapes, creating an unsightly dip that ruins the architectural lines you've worked to create.
Selecting the Right Hardware
For large windows, use a substantial rod. A 1-inch or 1.5-inch diameter rod provides the visual weight necessary to balance the scale of the window. If you are using a wide-extending rod to make the window look larger, ensure the brackets are heavy-duty and securely anchored into studs or using high-quality drywall anchors. A sagging rod is a dead giveaway of a budget-driven mistake and will detract from the "expensive" look of the room.
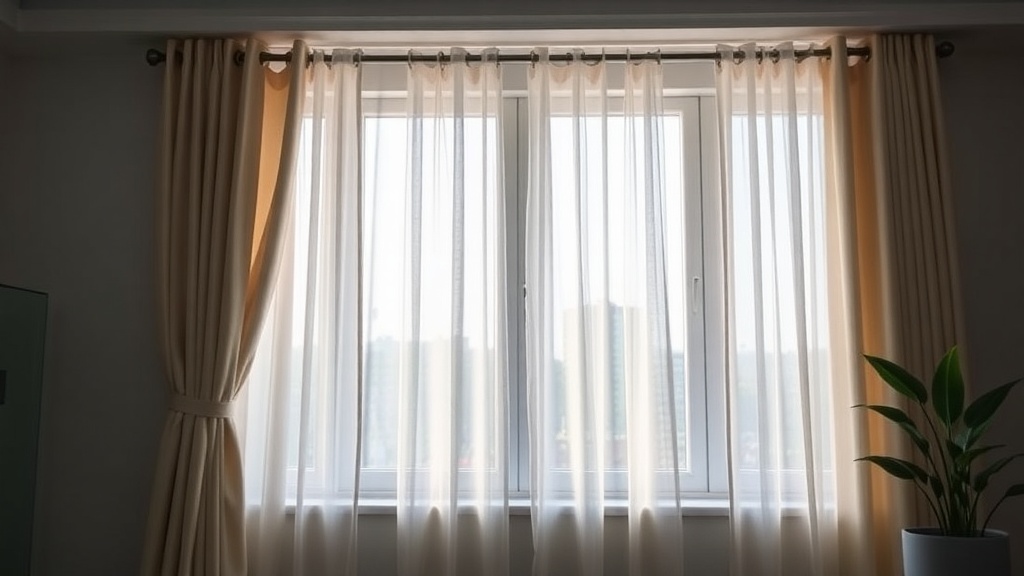
Texture and Light Play
The material you choose also dictates how the window interacts with the room. Heavy, opaque fabrics like velvet or heavy linen are excellent for creating a sense of enclosure and cozness, but they can make a small room feel darker if not paired with a wide-extending rod. Conversely, sheer fabrics allow light to diffuse throughout the room, which can make a space feel much larger. If you want both, use a double rod system: a sheer layer for light filtration and a heavier drape for privacy and texture. This layering adds depth and prevents the window from looking like a flat, two-dimensional surface.
Summary Checklist for Perfect Windows
Before you head to the home goods store, run through this checklist to ensure your new window treatments will actually expand your space:
- Is the rod high enough? It should be at least 4-6 inches above the window frame.
- Is the rod wide enough? It should extend 6-10 inches past the sides of the window.
- Is there enough fabric? Ensure you have at least 2.5x the width of the rod in total fabric width.
- Is the length correct? The curtains should either "kiss" the floor or "puddle" slightly—never float.
- Is the hardware sturdy? Choose a rod diameter that matches the weight of your fabric to avoid sagging.
By treating your windows as architectural features rather than just holes in the wall, you can change the entire geometry of your home. It isn't about spending more money; it's about understanding how lines, volume, and placement affect the human eye.